Applying style to text
Now we will learn how to decorate text.
<!DOCTYPE html>
<html>
<head>
<meta charset="utf-8" />
<title>Applying style to text</title>
</head>
<body>
    <p> hello world </p>
</body>
</html>
The default source is to test with the above source.
Applying fonts
To apply a font, we can use the font-family property.
selector {font-family: font1, font2, font3}
In css source above, the selector is the class name, tag name, and id as I mentioned before.
And font-family is a property that applies the font. The reason that the value has the font 1,2,3 is the priority. If there is no first font, then the next font is applied, or the next font is applied, like this.
Let's give it a try.
p{font-family:verdana}
Below is the tag if applied above source.
<!DOCTYPE html>
<html>
<head>
<meta charset="utf-8" />
<title>Applying fonts</title>
<style>
    p{font-family:verdana}
</style>
</head>
<body>
    <p> hello world </p>
</body>
</html>
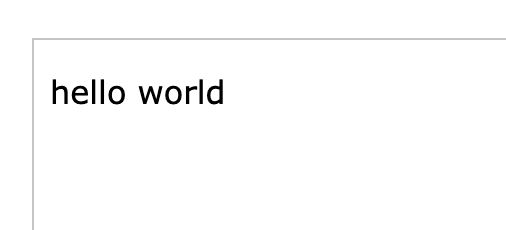
result

Apply the above source to your web editor or your editor. Then you can eliminate the CSS and see the differences.
Applying the font size
Let's apply the font size this time.
p{font-size:value}
Apply as above. And units are pt and px. There is more, but let's just let it know.
pt is the absolute value and px is the relative value. Since pt is an absolute value, it is almost never used and px is used mostly.
The reason is that the font size changes according to the resolution of the monitor and the size is adjusted to fit even if it is displayed on the mobile.
Therefore, we use px (relative value) a lot.
p{font-size:12px}
Therefore, we use a lot of px (relative value).
<!DOCTYPE html>
<html>
<head>
<meta charset="utf-8" />
<title>Decorate your text</title>
<style>
	p{font-size:12px}
</style>
</head>
<body>
	<p> hello world </p>
</body>
</html>
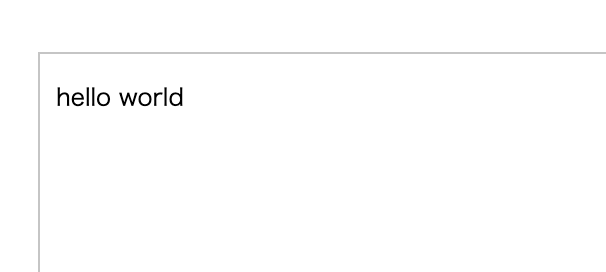
result

Let's test the above source and change the px value to test it.
Specify the type of letter
p{font-style:value}
Values are italic and normal. If you give italic, italic is applied, and normal does not give an italic effect.
font-style is used to give an italic effect.
So let's test it by example..
<!DOCTYPE html>
<html>
<head>
<meta charset="utf-8" />
<title>Decorate your text</title>
<style>
	p{font-style:italic}
</style>
</head>
<body>
	<p>hello world</p>
</body>
</html>
If you test the above source with the editor, you can see the italic effect.
Assign bold to text
p{font-weight:value}
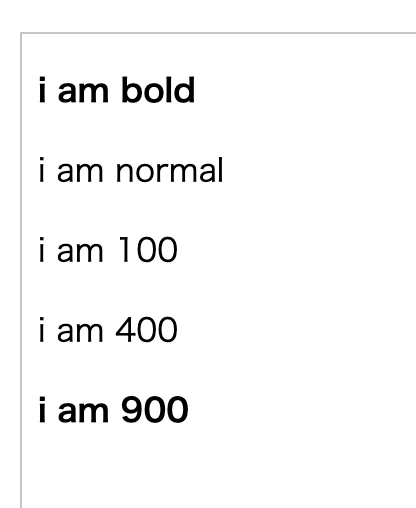
Values include bold, normal, and numbers from 100 to 900. It is explained that the thickness of the data is 100 ~ 900 steps, but as a result, between 600 and 900 is treated as bold
<!DOCTYPE html>
<html>
<head>
<meta charset="utf-8" />
<title>Decorate your text</title>
<style>
	.bold{font-weight:bold}
	.normal{font-weight:normal}
	.hundred{font-weight:100}
	.fourhundred{font-weight:400}
	.ninehundred{font-weight:900}
</style>
</head>
<body>
    <p class="bold">i am bold</p>
    <p class="normal">i am normal</p>
    <p class="hundred">i am 100</p>
    <p class="fourhundred">i am 400</p>
    <p class="ninehundred">i am 900</p>
</body>
</html>
Result is like below

Specifying text kerning
We use letter-spacing when reducing or increasing the spacing between the sides of the text.
p{letter-spacing:px}
When it comes to Values, there are px, pt, and em. But I only use px. Because it is a relative value, it automatically adjusts to monitor resolution.
Let's test it with an example source.
<!DOCTYPE html>
<html>
<head>
<meta charset="utf-8" />
<title>Decorate your text</title>
<style>
	p{letter-spacing:10px}
</style>
</head>
<body>
	<p>hello world</p>
</body>
</html>
Result is like below

I hope you can test the px values by changing them in the above source. And I need to ask you one thing. Are you just copying and pasting all the sources? I highly recommend that you actually type the sources.
If you want to decrease the space between letters, you can also give a negative number like this -1px.
Specifying line spacing
Let's control the line spacing.
p{line-height:value}
Values can be given in% or in px.
Let's test it. Let's try adjusting the width of the p tag to 300px.
<!DOCTYPE html>
<html>
<head>
<meta charset="utf-8" />
<title>Decorate your text</title>
<style>
	p{width:300px;line-height:20px}
</style>
</head>
<body>
	<p>From east to west, Europe is a mixture of cultures, languages, heritage, architecture and customs all across the continent. The dissolution of border checks within the EU means that travel in Europe has never been easier, more affordable or more convenient!
</p>
</body>
</html>
Please test it with different px values or with % in the above source. Then you are going to get the feel of it
Underline text
I've taught this in a simple style tag in html 2.
The lecture was just mentioning that these things are, and you need to control it with a stylesheet now.
Therefore, What I am teaching is just what I am teaching. To decide which tag you are going to use is your decision.
One tip is that it is always better to use CSS if possible.
text-decoration is used to apply a line of text.
p{text-decoraton:value}
kind of value :
underline
none
overline
line-through
try write line
<!DOCTYPE html>
<html>
<head>
<meta charset="utf-8" />
<title>text deocration</title>
<style>
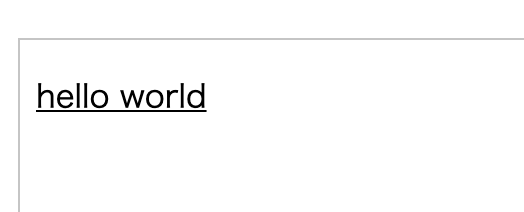
	p{text-decoration:underline}
</style>
</head>
<body>
	<p>hello world</p>
</body>
</html>
Result is like below

Try changing the value of text-decoration in the above source to overline, line-through, none.
So let's apply the font, size, shape, thickness, color etc. learned in the current course.
You need to know how to put multiple elements in order to do that. The method is simple.
tag{font-family:value;line-height:20px;letter-spacing:30px;font-style:italic;text-decoration:underline}

Enter {property: value; property: value; attribute: value} as above, enter the property and value, and use; (semicolon).
Let's test it.
Applying style to text
This time, I'll try to apply a stylesheet to the text.
<!DOCTYPE html>
<html>
<head>
<meta charset="utf-8" />
<title>Decorate your text</title>
</head>
<body>
	<p> hello world </p>
</body>
</html>
The above source would be the default this time.
Applying fonts
To apply a font, use the font-family property.
Selector {font-family: font1, font2, font3}
In css source above, the selector is the class name, tag name, and id as I mentioned before.
And font-family is a property that applies the font. The reason that the value has the font 1,2,3 is the priority. If there is no first font, then the next font is applied, or the next font is applied, like this.
Then, let’s give it a try!
p{font-family:verdana}
Apply the above, then you will get the result as below.
<!DOCTYPE html>
<html>
<head>
<meta charset="utf-8" />
<title>Decorate your text</title>
<style>
	p{font-family:verdana}
</style>
</head>
<body>
	<p> hello world </p>
</body>
</html>
Apply the above source to your web editor or your editor. Then you can eliminate the CSS and see the differences.
Applying the font size
p{font-size:value}
Apply as above. And units are pt and px. There is more, but let's just let it know.
pt is the absolute value and px is the relative value. Since pt is an absolute value, it is almost never used and px is used mostly.
The reason is that the font size changes according to the resolution of the monitor and the size is adjusted to fit even if it is displayed on the mobile.
Therefore, we use a lot of px (relative value).
p{font-size:12px}
Let's apply.
<!DOCTYPE html>
<html>
<head>
<meta charset="utf-8" />
<title>Decorate your text </title>
<style>
	p{font-size:12px}
</style>
</head>
<body>
	<p> hello world </p>
</body>
</html>
Let's test the above source and change the px value to test it.
p{font-style:value}
Values are italic and normal. If you give italic, italic is applied, and normal does not give an italic effect.
font-style is used to give an italic effect.
So let's test it by example..
<!DOCTYPE html>
<html>
<head>
<meta charset="utf-8" />
<title>Decorate your text</title>
<style>
	p{font-style:italic}
</style>
</head>
<body>
	<p>hello world</p>
</body>
</html>
If you test the above source with the editor, you can see the italic effect.
Assign bold to text
p{font-weight:value}
Values include bold, normal, and numbers from 100 to 900. It is explained that the thickness of the data is 100 ~ 900 steps, but as a result, between 600 and 900 is treated as bold
<!DOCTYPE html>
<html>
<head>
<meta charset="utf-8" />
<title>Decorate your text </title>
<style>
	.bold{font-weight:bold}
	.normal{font-weight:normal}
	.hundred{font-weight:100}
	.fourhundred{font-weight:400}
	.ninehundred{font-weight:900}
</style>
</head>
<body>
<p class="bold">i am bold</p>
<p class="normal">i am normal</p>
<p class="hundred">i am 100</p>
<p class="fourhundred">i am 400</p>
<p class="ninehundred">i am 900</p>
</body>
</html>
Result is like below

Specifying text kerning
We use letter-spacing when reducing or increasing the spacing between the sides of the text.
p{letter-spacing:px}
When it comes to Values, there are px, pt, and em. But I only use px. Because it is a relative value, it automatically adjusts to monitor resolution.
Let's test it with an example source.
<!DOCTYPE html>
<html>
<head>
<meta charset="utf-8" />
<title>Decorate your text </title>
<style>
	p{letter-spacing:10px}
</style>
</head>
<body>
	<p>hello world</p>
</body>
</html>
I hope you can test the px values by changing them in the above source. And I need to ask you one thing. Are you just copying and pasting all the sources? I highly recommend that you actually type the sources.
If you are familiar with the basic html structure, it's all right, but if not, try it out by hand. I think this is more than It is better to actually try it.
If you want to decrease the space between letters, you can also give a negative number like this -1px.
Specifying line spacing
Let's control the line spacing.
p{line-height:value}
Values can be given in% or in px.
Let's test it. Let's try adjusting the width of the p tag to 300px.
<!DOCTYPE html>
<html>
<head>
<meta charset="utf-8" />
<title>Decorate your text</title>
<style>
	p{width:300px;line-height:20px}
</style>
</head>
<body>
	<p> From east to west, Europe is a mixture of cultures, languages, heritage, architecture and customs all across the continent. The dissolution of border checks within the EU means that travel in Europe has never been easier, more affordable or more convenient!</p>
</body>
</html>
Please test it with different px values or with % in the above source. Then you are going to get the feel of it
Underline text
I've taught this in a simple style tag in html 2.
The lecture was just mentioning that these things are, and you need to control it with a stylesheet now.
Therefore, What I am teaching is just what I am teaching. To decide which tag you are going to use is your decision.
One tip is that it is always better to use CSS if possible.
텍스트에 줄긋기를 적용 시킬려면 text-decoration을 사용한답니다.
p{text-decoraton:value}
kind of value
underline
none
overline
line-through
Text-decoration is used to apply a line of text.
<!DOCTYPE html>
<html>
<head>X
<meta charset="utf-8" />
<title>text decoration</title>
<style>
	p{text-decoration:underline}
</style>
</head>
<body>
	<p>hello world</p>
</body>
</html>
In the above source, test the text-decoration by changing it to overline, line-through, or none.
So let's apply the font, size, shape, weight, color, etc. that we learned in the current lesson.
To do that, you need to know how to put multiple elements. The method is simple.
taga{font-family:value;line-height:20px;letter-spacing:30px;font-style:italic;text-decoration:underline}
for example
    tag{attribute:value;attribute:value;attribute:value}
let's test it
<!DOCTYPE html>
<html>
<head>
<meta charset="utf-8" />
<title>text-decoration</title>
<style>
	h2{color:#333;font-style:italic}
	p{color:blue;font-style:normal;text-decoration:underline;line-height:30px}
</style>
</head>
<body>
	<h2>IT! News</h2>
	<p>
cyber cronox has become a world leader.

It stores all the DNA information of people around the world and provides a predictable future.</p>
</body>
</html>
This concludes our text-related CSS tutorial.
<!DOCTYPE html>
<html>
<head>
<meta charset="utf-8" />
<title>text-decoration</title>
<style>
	h2{color:#333;font-style:italic}
	p{color:blue;font-style:normal;text-decoration:underline;line-height:30px}
</style>
</head>
<body>
	<h2>IT! News</h2>
	<p>
cyber cronox has become a world leader.

It stores all the DNA information of people around the world and provides a predictable future.
	</p>
</body>
</html>
This concludes our text-related CSS tutorial.


