CSS selector
Use tag name as selector
Let's look at how to use the selector with the tag name.
This is very simple. You can write the tag name and open and close the parentheses. As follows.
For example, if you select the p tag ...
p{CSS property:value}
Using a tag as a selector implies that all of the enclosed parts of the tag are covered. If you use the p tag more than once, then all the tags will have the same CSS attributes.
Let's set the text color of the p tag to red. In this part, what we will learn is to apply the style for the same tag.
<!DOCTYPE html>
<html>
<head>
<meta charset="utf-8" />
<title>Use the tag name as a selector</title>
<style>
p{color:red}
</style>
</head>
<body>
    <p>hello world</p>
    <p>hello usa</p>
    <p>hello korea</p>
    <p>hello japan</p>
    <p>hello germany</p>
    <p>hello france</p>
    <h1>hello france</h1>
</body>
</html>
If you copy / paste or type it in by yourself (I highly recommend to type it in on your own!) the above source in the editor or EverDivel Practice Area (top menu on the left), you can see that the color of the text wrapped with the p tag is all red.

The color of the text declared with the p tag, like the image above, is represented in red. On the other hand, you can see that the h1 tag does not apply.
Use a selector by specifying a class attribute in the tag
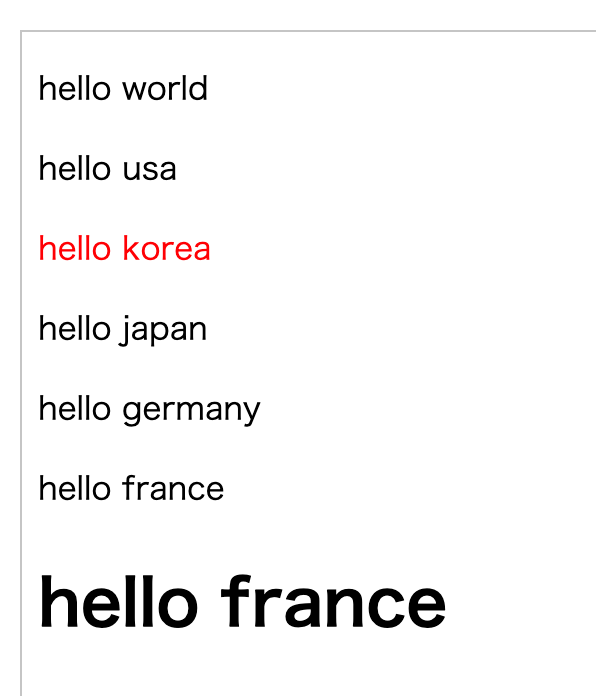
Let's make only “hello korea” red (compared to the above source! : it is all changed to red color)
In other words, even if you use the same tag, only the specific tag is applied to the style. To do so, you need to give the specific tag a separate name.
Class = "name" in the tag to be applied. We are going to use this a lot in next lessons J And it is not difficult! (Believe me!)
<p class="red">hello korea</p>
If you specify a class in the p tag that starts as above and name it, you are done. I have specified the class name as red as above.
If you declare a class, you can declare it in the style sheet as follows.
.class name{css value}
.red{color:red}
That is, take a point and class name {style sheet element}
Let's create the following source and test it. A feature of class is that a name can be used multiple times.
<!DOCTYPE html>
<html>
<head>
<meta charset="utf-8" />
<title>Use the class as a selector</title>
<style>
    .red{color:red}
</style>
</head>
<body>
    <p>hello world</p>
    <p>hello usa</p>
    <p class="red">hello korea</p>
    <p>hello japan</p>
    <p>hello germany</p>
    <p>hello france</p>
    <h1>hello france</h1>
</body>
</html>
The results are shown in red color only in hello korea as shown below.

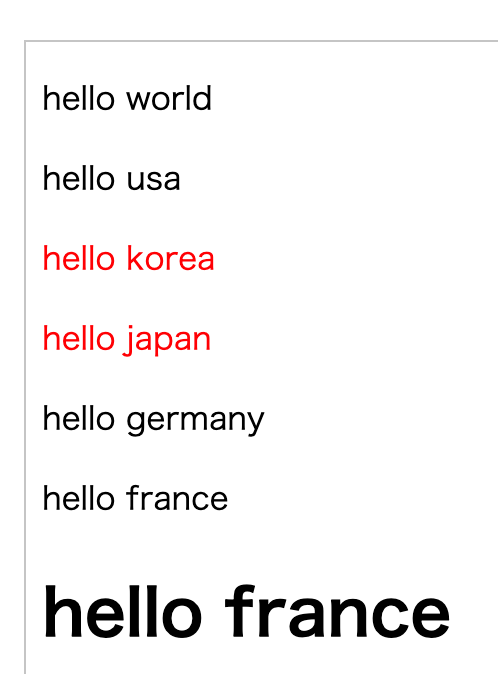
Using class more than once means that class = "red" can be applied to other p tags as well.
This time, I will make a hello japan red. It is a promise to put a point(.) before the class name.
<!DOCTYPE html>
<html>
<head>
<meta charset="utf-8" />
<title>Use the class as a selector</title>
<style>
    .red{color:red}
</style>
</head>
<body>
    <p>hello world</p>
    <p>hello usa</p>
    <p class="red">hello korea</p>
    <p class="red">hello japan</p>
    <p>hello germany</p>
    <p>hello france</p>
    <h1>hello france</h1>
</body>
</html>
result

The html tag is limited, but what you need to do is very different depending on the document size. However, if you apply the same style to the same tag, the degrees of freedom will be much lower. Therefore, even if you use the same tag, you need to declare the class name separately and customize it according to its position and function.
That is, you are going to use classes frequently in CSS
This time, let's look at how to make only inherited tags declared.
We declare the h1 tag inside the list tag and declare the h1 tag outside the list tag so that only the tags in the list are declared.
That way you can access child elements with spaces.
In the following sources, the h1 tag is inherited by the li tag. You can use li h1 {css} to distinguish between spaces.
<ul>
    <li>
        <h1>hello world</h1>
    </li>
</ul>
<h1>hello world</h1>
let's typing sources
<!DOCTYPE html>
<html>
<head>
<meta charset="utf-8" />
<title>Use child tag as selector <</title>
<style>
    li h1{color:red}
</style>
</head>
<body>
    <ul>
    <li><h1>hello world in list </h1></li>
    </ul>
    <h1>hello world in h1</h1>
</body>
</html>
result

As shown above, h1 in the list has the text color red, and h1 tags outside the list tag do not.
By using like Li h1 {color: red}, You can apply styles in this way.
Use the selector by specifying the id attribute in the tag
Now, let's look at how to use the ID value as a CSS selector by adding an ID attribute to the tag.
The value of the id can only be used once, as we have a unique id in any web service.
That is, if you have applied the id value of coreasur to any tag, you should not apply it to any other tag. It's a unique value.
It is different from Classes, since classes can be used many times.
And the class is prefixed with a . The ID is appended with #. As follows.
#ID{CSS attribute: value}
<!DOCTYPE html>
<html>
<head>
<meta charset="utf-8" />
<title>Use ID as a selector</title>
<style>
    #hello{color:skyblue}
</style>
</head>
<body>
    <p id="hello">hello world</p>
</body>
</html>
result

Because IDs can not be used multiple times with the same name, you should not use like below:
<!DOCTYPE html>
<html>
<head>
<meta charset="utf-8" />
<title>Use ID as a selector</title>
<style>
    #hello{color:skyblue}
</style>
</head>
<body>
    <p id="hello">Do not use it this way.</p>
    <p id="hello">Do not use it this way.</p>
</body>
</html>
This time, we have learned how to apply the css attribute. ^^


